Windows 10 Core Isolation: Remove incompatible drivers
Hello,
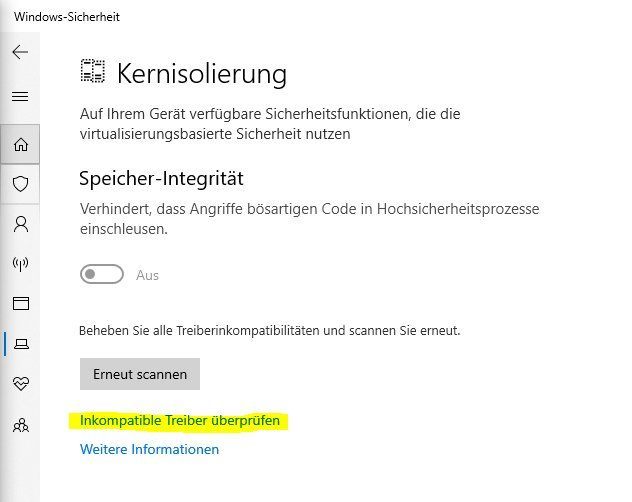
Actually, I just wanted to follow the Windows Security recommendations and under Settings -> Windows Security -> Core Isolation, turn on Memory Integrity.
According to Microsoft, the core isolation is there to protect the computer from malware attacks. By enabling memory integrity, you can prevent malware from accessing Windows 10's high-security processes in the event of an attack.
However, to my surprise, a message about driver incompatibilities appears and memory integrity cannot be turned on. The link "Check incompatible drivers" appears.
P.S. I know the screenshots are in german language. I'll try to add the screenshots at some point.
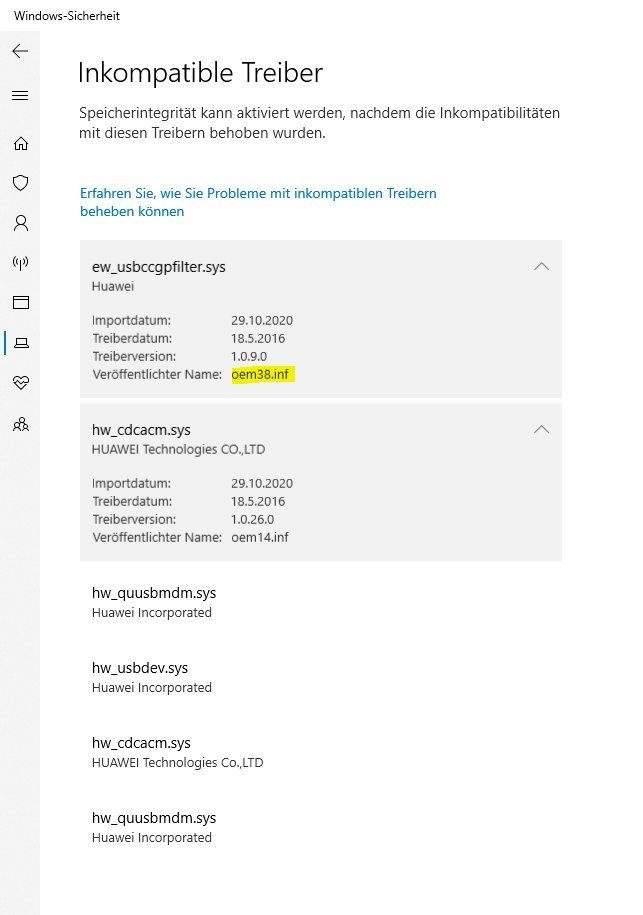
If you click on it, a list of incompatible drivers appears. If you click on the respective driver, its .inf name also appears. This is needed to finally uninstall the driver.
Warning, before you continue now, you should have a backup of the system. It is not guaranteed that the system will work properly afterwards. For example, if you delete the wrong .inf file, it can harm Windows and it may not start anymore. This should only be done by experienced users who know what this means!
Now we open the Windows PowerShell as "Administrator". With the command pnputil we can look at the active drivers and compare them again with the list if necessary.
In my case, it's drivers from Huawei from HiSuite (which was actually completely uninstalled, the uninstaller probably forgets the drivers).
If both have the same *.inf name we can start deleting them:
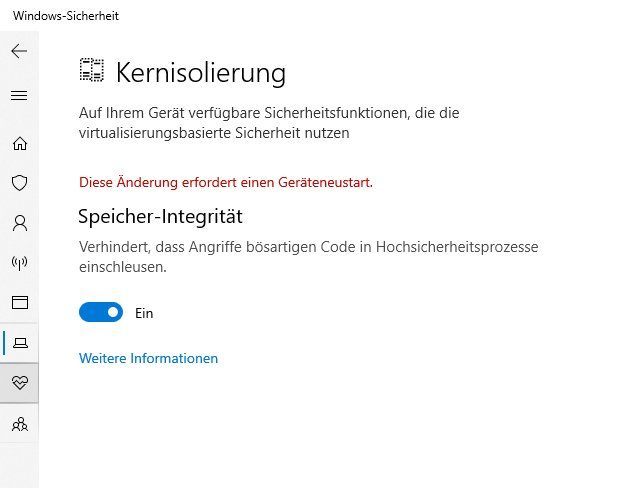
Now click on the "Scan again" button. Now the "Core isolation -> Memory integrity" should switch on and the note for a device restart appears.
Now restart the system. After that, core isolation -> memory integrity should be enabled and working.
Here is another alternative via Autoruns for Windows:
You can also go the way over the directory: C:\Windows\System32\DriverStore\FileRepository. But there you have to change the access rights to delete the .inf files. The way via pnputil is much easier from my point of view.
Greeting
Frank
Actually, I just wanted to follow the Windows Security recommendations and under Settings -> Windows Security -> Core Isolation, turn on Memory Integrity.
According to Microsoft, the core isolation is there to protect the computer from malware attacks. By enabling memory integrity, you can prevent malware from accessing Windows 10's high-security processes in the event of an attack.
However, to my surprise, a message about driver incompatibilities appears and memory integrity cannot be turned on. The link "Check incompatible drivers" appears.
P.S. I know the screenshots are in german language. I'll try to add the screenshots at some point.
If you click on it, a list of incompatible drivers appears. If you click on the respective driver, its .inf name also appears. This is needed to finally uninstall the driver.
Warning, before you continue now, you should have a backup of the system. It is not guaranteed that the system will work properly afterwards. For example, if you delete the wrong .inf file, it can harm Windows and it may not start anymore. This should only be done by experienced users who know what this means!
Now we open the Windows PowerShell as "Administrator". With the command pnputil we can look at the active drivers and compare them again with the list if necessary.
pnputil /enum-drivers....
Published name: oem26.inf
Original name: hw_usbdev.inf
Provider name: Huawei Incorporated
Class name: Connections (COM & LPT)
Class-GUID: {4d36e978-e325-11ce-bfc1-08002be10318}
Driver version: 04/20/2012 1.3.0.0
Name of the signature provider: Microsoft Windows Hardware Compatibility Publisher
...In my case, it's drivers from Huawei from HiSuite (which was actually completely uninstalled, the uninstaller probably forgets the drivers).
If both have the same *.inf name we can start deleting them:
Windows PowerShell
Copyright (C) Microsoft Corporation. Alle Rechte vorbehalten.

PS C:\WINDOWS\system32> pnputil /delete-driver oem26.inf
Microsoft PnP utility
The driver package was successfully deleted.

PS C:\WINDOWS\system32> pnputil /delete-driver oem38.inf
Microsoft PnP utility
The driver package was successfully deleted.

PS C:\WINDOWS\system32> pnputil /delete-driver oem14.inf
Microsoft PnP utility
The driver package was successfully deleted.

PS C:\WINDOWS\system32> pnputil /delete-driver oem35.inf
Microsoft PnP utility
The driver package was successfully deleted.

PS C:\WINDOWS\system32> pnputil /delete-driver oem11.inf
Microsoft PnP utility
The driver package was successfully deleted.

PS C:\WINDOWS\system32> pnputil /delete-driver oem8.inf
Microsoft PnP utility
The driver package was successfully deleted.
Now click on the "Scan again" button. Now the "Core isolation -> Memory integrity" should switch on and the note for a device restart appears.
Now restart the system. After that, core isolation -> memory integrity should be enabled and working.
Here is another alternative via Autoruns for Windows:
You can also go the way over the directory: C:\Windows\System32\DriverStore\FileRepository. But there you have to change the access rights to delete the .inf files. The way via pnputil is much easier from my point of view.
Greeting
Frank
Please also mark the comments that contributed to the solution of the article
Content-Key: 769558697
Url: https://administrator.de/contentid/769558697
Printed on: April 19, 2024 at 13:04 o'clock


